Stuff from Shivers:
Some interesting graphics I found in Shivers' resource files. Relatively spoiler-free.
Pic 20411: Looks like a plea for a version of this scene with the sarcophagus open.
***
Pic 12221: A rough version of the museum's blueprint.
***
Pic 16905: A rough version of the note on the theater podium -- notice how Beth and Merrick's handwriting styles in this image are the exact opposite of their styles in the graphic in the game.
***
Most of the following views appear to be rough mockups of the game's puzzles that look almost as if they were done in MS Paint. It’s interesting to see them still in the resource files. Since many of the views have numerous loops, I've included some of the frames from the loops with the main frame.
View 50700: The artifact cabinet puzzle.
***
View 50900: The door to the theatre.
***
View 51300: The door to the underworld.
***
View 51400: The rotating skulls "puzzle".

***
View 51700: The projector reels (not really a puzzle).

***
View 52000: I'm not sure what puzzle this is.

***
View 52010: The "marble-path" puzzle.
***
View 52100: The infamous Chinese checkers puzzle.
***
View 52200: The drums puzzle.
***
View 52300: The harp puzzle.
***
View 52310: The "red door" puzzle.
***
View 52400-52401: The "Anansi the Spider" music box.
***
View 52700:
Either it's been too long since I've played Shivers or this puzzle doesn't have a counterpart in the final game. It looks like some sort of tile puzzle.EDIT: This is the puzzle that opens the door to the room with the fortune teller (thank you to Skeen for clearing that up).
***
View 52900: The door from the UFO exhibit to the inventions exhibit.
***
View 53100: I think this is the marble-flipping puzzle.
***
View 53101: Probably the first door in the puzzle room.
***
View 54000: The door to the tower.
***
Pic 6242: There is a pencil lying on Professor Windlenot's desk. It's not visible in the close-up of the tape player, however, there is an alternate shot of the tape player where it is visible. (added 4-10-10)
***
Pic 8347: A missing set of pages from In Search of the Unexplained! In the game, you are only able to read as far as page 26 (the one with the picture of the unicorn). However, these two pages follow that one, and I don't know whether they were left out accidentally or intentionally. View 8348 includes these pages as well. (Incidentally, the picture of the griffin is a smaller version of the one from Windlenot's scrapbook.) (added 4-10-10)
***
Pic 16600: If you look at the center of the theater's stage from a distance, you may notice something tiny sticking out of the front, illuminated by a spot of light. I've discovered that this is actually a "clone" of Merrick's pocket knife, and the artists apparently forgot to edit it out when it was decided that the knife would be holding the sheet of paper onto the podium instead. You can't see this "clone" if you're standing too close to where it used to be, but I was able to find an unused close-up shot of it. (added 4-10-10)
***
Pic 16900: A head-on view of the podium in the theater. Notice how the sheet of paper the knife is holding seems to be blank, and the lamp doesn't appear to be touching the podium. (added 4-10-10)
***
Pic 35260: A view of the surveillance monitors in the clocktower that wasn't used, and for obvious reasons -- look at the monitors. Nearly all of them have "Monitor [monitor's number]" printed on them. (There's another version of this scene with the pot in the background open.) (added 4-10-10)
***
Pic 31270: An early version of the dreaded marble puzzle. The only major difference is that the seventh slot from the left has the warped pink-and-blue pattern that most of the Puzzle Room has. The slot is light purple in the final game. (There is a graphic for the corresponding marble as well in View 31270.) (added 4-10-10)
***
Pic 27105: This is very interesting. It's what looks like an early rendering of one of the museum's hidden second floor hallways. The lighting and textures are much less dark and gritty, making this look almost like the way the hallways might have looked when the museum was much younger. There are a lot of these early renders, so I'm only going to be showing some of the more interesting ones. (added 4-10-10)
***
Pic 27115: Another early hallway render showing a small alcove with a lumpy greenish-gray...thing sitting in it. (added 4-10-10)
***
Pic 27145: An early render of the stairs from the third floor hallway to the second floor hallway. I don't know why the artists used that purple rock texture on the steps, though. (added 4-10-10)

***
Pic 27175: An early hallway render with some different paintings on display. (added 4-10-10).
***
Pic 27420: Another early render of the second/third floor steps showing just how unfinshed these scenes were. The steps here are just flat strips, and that purple rock texture makes them look even more fake. (added 4-10-10)
***
Pic 33420: An unfinished render of the third floor hallway, looking much cleaner and better lit than it does in the final game. (added 4-10-10)
***
View 40030: This animation was apparently meant to appear with the Pic of the same number, which is a shot of the tower stairs. However, I've gone to this location (which is two clicks up from the tower's base), turned around multiple times, and never saw this animation. (Strange, I thought the Stone Ixupi escaped into the world and wasn't in the museum anymore...) (added 4-11-10)
***
And, as the grand finale, this shocking* find (View 39262).
It looks like one of the Shivers animators did not like the game's designer at all...

*I just realized what a horrible choice of word that was to describe a sparking electrical wire. Sorry, everyone.
***
View 28021: This view shows the door in the room with the fortune-telling machine opening to reveal a moose's head. It then shows the moose talking and sticking its tongue out. This might be part of an Easter Egg that has yet to be discovered. (Added 1-2-13. Credit for this find goes to BBP from the Sierra Help Forums!)
***
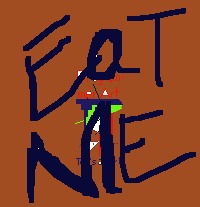
View 8160: This sprite is from a two-frame animation. The first frame shows the candelabra from the library minus its candles, but the second frame shows a garish image with the words "EaT ME" scrawled across it. There are other words as well, but they are almost completely obscured. All I can make out are the words "Programmer Art".
(added 9-22-14 -- thanks for finding this, GameBop!)
Back to Sierra's Resource Files